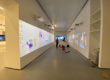
Why LiDAR Installation Accuracy Matters
In immersive interactive environments, the installation accuracy of LiDAR sensors directly determines user experience.
Many users report that traditional LiDAR systems are:
- Complex to install
- Difficult to calibrate
- Easy for beginners to misconfigure
To solve these challenges, CPJROBOT POELIDAR-M1 offers a streamlined solution.
This guide provides a step-by-step installation walkthrough, from preparation to calibration, helping you quickly deploy interactive systems for:
- Floor interaction
- Wall interaction
- Immersive projection spaces
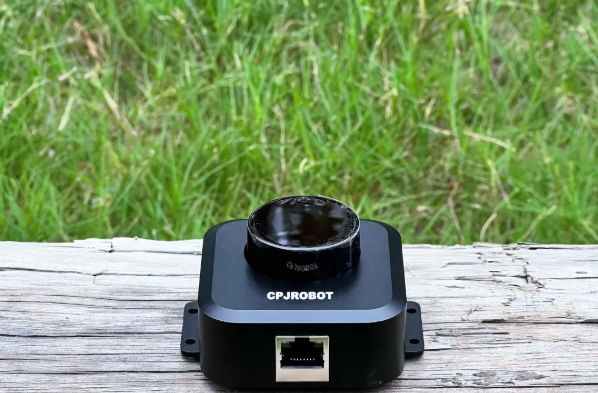
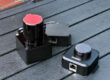
What Makes POELIDAR-M1 Different
POELIDAR-M1 is a cost-effective and lightweight LiDAR solution designed specifically for interactive applications.
Key Advantages:
- PoE (Power over Ethernet): One cable for power + data
- 360° omnidirectional scanning
- Built-in calibration software
- Compact size (only 125.5g)
- Multi-device scalability (20+ units supported)
It eliminates the traditional pain points of complex wiring and difficult setup, making it ideal even for beginners.
1. Pre-Installation Preparation
Required Materials
Core Equipment
- POELIDAR-M1 LiDAR unit
- PoE switch (recommended: Mercury PoE switch)
Installation Accessories
- M3 self-tapping screws (3mm diameter)
Connectivity
- Cat6 or above Ethernet cable
- Must support IEEE 802.3af PoE standard
- Max transmission distance: 100m
Tools
- Screwdriver
- Drill (if mounting required)
System Requirements
- PC with Ethernet port
- (If no Ethernet port → use USB-to-Ethernet adapter)
- Windows 10 or above
- Single desktop display (multi-screen setups may affect calibration)
📍 Environment Selection
Area Planning
- Determine interactive area size (floor or wall)
- Effective LiDAR range: >4 meters
- Pay attention to diagonal coverage (longest distance)
Environmental Control
Avoid:
- Direct sunlight
- Reflective surfaces (glass, polished metal, reflective trims)
These may cause:
- Signal interference
- “Ghost triggering”
Mounting Requirements
- Flat and stable surface (wall or ceiling)
- No obstruction in scanning area
- Ensure LiDAR sensor head is fully exposed above the interaction surface
Temperature
- Operating range: 0–40°C
2. Step-by-Step Installation
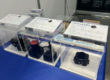
🛠 Step 1: System Preparation
Before installing LiDAR:
- Install and adjust the projector
- Set up the PC desktop
- Power the PoE switch
- Connect Ethernet cables
- Install LiDAR software
- Configure IP addresses (PC & LiDAR in same subnet)
🛠 Step 2: Mount the LiDAR
- Install LiDAR at the planned position (do NOT fully tighten yet)
- Open calibration software
- Enter raw signal interface
Check:
- Signal coverage
- Alignment with real environment
👉 Adjust LiDAR position until:
- Full coverage is achieved
- No interference is detected
Then secure the device firmly
🛠 Step 3: Calibration & Debugging
- Follow the built-in software guide (each step includes tutorial videos)
- Complete calibration process
- Open “Server” software
- Select interaction protocol based on content
✅ Installation completed
3. On-Site Optimization & Troubleshooting
❌ LiDAR Not Connecting
Step 1:
Check indicator lights on:
- LiDAR Ethernet port
- PoE switch
Then ping default IP:192.168.0.7
Step 2:
Check PoE switch:
- Voltage: 48V–53V required
- Avoid 24V PoE switches
- Ensure sufficient power per port
Step 3:
Check Ethernet cable:
- All 8 wires must be properly connected
- Poor cables may allow data but not power
Step 4:
Disable firewall:
- Windows firewall
- Third-party software (e.g., antivirus/firewall tools)
Step 5:
Check IP conflicts:
- Ensure no duplicate IP in the network
❌ Ghost Triggering
Possible causes:
- Reflective surfaces
- Strong light interference
Solutions:
- Block interference zones in software
- Clean LiDAR lens cover
❌ Low Touch Accuracy
Case 1: Systematic Error
- Caused by projection mapping issues
- Uneven coordinate distribution
👉 Check:
- Projection blending
- Coordinate alignment
Case 2: Installation Error
- Incorrect LiDAR angle
- Unstable mounting
- Incomplete coverage
👉 Solution:
- Re-adjust installation
- Recalibrate 4-point mapping
4. Multi-Scenario Applications
🌐 Supported Scenarios
POELIDAR-M1 supports:
- Interactive floor projection
- Interactive wall systems
- Irregular projection mapping
- Immersive environments
Compatible with:
- Projectors
- LED screens
- Video walls
🚀 Scalability
- Multi-LiDAR cascading supported
- One PC can control 20+ LiDAR units
- Ideal for large-scale immersive installations
Professional Support & Custom Solutions
For:
- Large-scale projects
- Custom interaction software
- Complex environments
CPJROBOT provides:
- Installation guidance
- Layout planning
- System integration support
Conclusion
From product design to real-world deployment, CPJROBOT focuses on solving industry pain points.
POELIDAR-M1 simplifies:
- Installation
- Calibration
- System integration
Making immersive interactive systems accessible, stable, and scalable