
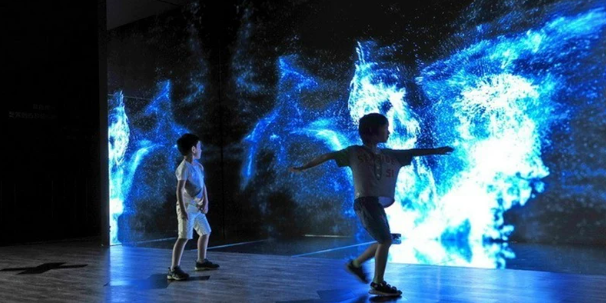
A successful museum interactive projection project starts with a clear specification. Before selecting sensors or projectors, the team needs to define what visitors should do, where interaction will happen, and how the finished installation will be evaluated.
This matters because equipment specifications describe individual components. Visitors experience the entire system: sensing, software, projected content, and the physical space working together.
The best way to select a museum LiDAR interactive projection system is to turn the exhibition concept into measurable requirements, validate a representative prototype, and purchase against agreed acceptance criteria.
This guide focuses on those decisions—from spatial planning and software integration to operating costs—and explains where CPJROBOT M1 and T1 LiDAR sensors fit into the evaluation process.
1. Confirm the Requirements Before Requesting Quotations
A useful project brief should describe the intended experience precisely enough for different suppliers to quote comparable solutions.
| Requirement | What to specify |
|---|---|
| Interaction surface | Wall, floor, tabletop, or a combination |
| Active area | Actual interaction dimensions, excluding decorative projection |
| Visitor actions | Selecting, pointing, moving, dragging, or entering zones |
| Simultaneous participation | Expected active participants and nearby spectators |
| Smallest target | The smallest selectable object in physical dimensions |
| Response expectations | Acceptable delay between an action and visible feedback |
| Operating conditions | Lighting, visitor traffic, daily operating hours |
| Content platform | Existing software, development engine, and operating system |
| Data requirements | Whether cameras, recording, or stored movement data are permitted |
| Service requirements | Restart, recalibration, support, and content update procedures |
Avoid requirements such as “high precision” without defining what they mean. Selecting a large floor zone and dragging a small tabletop object require different levels of positional accuracy.
Similarly, distinguish the number of people present from the number actively interacting. Both influence the installation, but in different ways.
2. Choose Sensing According to the Surface and Action
Wall, floor, and tabletop projects can all use LiDAR, but they should not automatically use the same sensing arrangement.
Wall Interaction
For selections on a flat wall, a 2D LiDAR scan plane positioned near the surface can detect objects entering that plane.
Evaluate whether the exhibit needs near-surface activation or actual physical contact. If contact is essential, compare LiDAR with a suitable touch overlay or touch-sensitive display.
For body poses or movement at different distances from the wall, evaluate depth sensing or another appropriate 3D approach.
Floor Interaction
LiDAR can be evaluated for position-based floor activities where objects intersect a low scanning plane.
If the application requires overhead silhouettes or full-body movement, a camera-based system may provide more relevant information. If it needs measured pressure or weight, optical position sensing alone does not supply that measurement.
Tabletop Interaction
Tabletop selection places particular emphasis on minimum sensing distance, target separation, and hand occlusion.
Test small objects and simultaneous reaches using the proposed table dimensions. Where objects must be recognized by identity rather than position, additional sensing or tagging may be necessary.
A camera is not inherently required for a LiDAR-based installation. However, confirm the complete system design: an integrator may add cameras for calibration, additional tracking, or other functions. Also distinguish the absence of video capture from the absence of stored interaction data.
3. Determine Sensor Quantity, Mounting Position, and Coverage
There is no dependable rule that converts floor area directly into a LiDAR quantity.
A sensor’s maximum distance and scanning angle do not, by themselves, establish reliable interactive coverage. The design must account for minimum range, target size, viewing direction, obstructions, and occupied conditions.
Ask the supplier to provide an annotated coverage drawing showing:
- Sensor positions and scan directions.
- The intended scan plane.
- Near and far limits of the interaction area.
- Obstructions and likely blind spots.
- Overlapping coverage, where applicable.
- Access for adjustment and maintenance.
Set Mounting Height from the Required Detection
Mounting height should follow the object being detected.
For a floor activity, the relevant target may be footwear or lower legs. For a wall or table, the scan plane may need to sit close to the interaction surface.
Rather than specifying a universal height, require a proposed mounting detail and a practical demonstration. Small changes in orientation can alter where an interaction is detected.
Validate Coverage with Visitors Present
An empty-space demonstration is insufficient. Include people standing near the sensor, crossing the area, and gathering around popular controls.
Additional sensors can provide different viewpoints, but the software must combine their measurements and handle overlapping detections.
CPJROBOT’s M1 installation documentation covers mounting, calibration, and multi-device deployment. These resources can inform the design, while final coverage still requires project-specific validation. CPJROBOT M1 installation guide
4. Match Projector Brightness, Resolution, and Throw Distance
Select the projector and lens together with the image dimensions and available mounting positions.
Brightness: Evaluate the Actual Viewing Conditions
Brightness requirements depend on ambient light, image area, surface characteristics, and content.
A broad animation and a detailed historical document may need different viewing conditions even when projected at the same size. Compare brightness specifications measured under comparable standards, and request a demonstration with representative content.
Epson’s projector guidance discusses lumen output and distinguishes white and color brightness measurements. Epson projector brightness guide
A generic lumen recommendation is not a substitute for checking legibility in the planned gallery.
Resolution: Start with the Smallest Important Detail
Evaluate the smallest label, symbol, or interaction target from the expected viewing distance.
Native resolution matters, but so do image width, content scaling, and any loss of usable pixels through geometric correction. A projector’s ability to accept a high-resolution signal does not necessarily describe its native display resolution.
Throw Distance: Check the Lens Geometry
For an initial estimate:
Throw ratio = projection distance ÷ image width
For example, a 4-meter-wide image projected from 3 meters away requires approximately a 0.75:1 throw ratio. This is an illustrative calculation; confirm the exact lens range, measurement reference, offset, and lens shift using the selected manufacturer’s documentation.
Check that the resulting mounting position also works with visitor sightlines, shadows, and service access.
5. Separate Calibration, Content, and System Control
These functions are connected, but they should be specified individually.
Coordinate Calibration
Calibration maps detected positions to the content’s coordinate system.
Complete projector alignment before final interaction calibration. Moving a projector, changing image geometry, or adjusting a sensor can require recalibration.
The handover should include saved configurations and instructions that museum staff can follow.
Content Integration
Do not accept “supports Unity” or “has an API” as a complete integration specification.
Ask what data the system outputs, how it is delivered, and which software versions have been demonstrated.
| Platform or interface | Evidence to request |
|---|---|
| Unity | A working receiver in the intended Unity version |
| Unreal Engine | A tested plugin, receiver, or documented SDK integration |
| TouchDesigner | A working project receiving the required input data |
| TUIO | Supported profile/version, event fields, and coordinate convention |
| SDK or API | Documentation, sample code, license terms, and supported platforms |
Unity and Unreal are development engines, TouchDesigner is a visual development environment, and TUIO is an interaction protocol. Support for one does not establish a complete integration with all the others.
CPJROBOT publishes a Unity/TUIO integration guide. Use it as a starting point, then validate the selected sensor, middleware, and application together. CPJROBOT Unity and TUIO integration guide
System Control
Specify what happens when the gallery opens, closes, or loses a connection.
The control plan should cover scheduled startup, application recovery, projector control, device status, and restoration after a power interruption. Assign responsibility for each function to the relevant supplier.
6. Evaluate CPJROBOT M1 and T1 Against the Brief
CPJROBOT is a LiDAR manufacturer offering M1 and T1 sensors alongside software and development resources. Both are worth considering during museum interactive projection selection, with the final choice based on demonstrated suitability. CPJROBOT manufacturer website
When to Evaluate M1
The CPJROBOT M1 offers 360° scanning and Power over Ethernet.
It is a useful candidate when the proposed installation benefits from combined power-and-data cabling and a wide scanning angle. Ask for a layout based on the actual interaction area and a test of the smallest required targets. CPJROBOT M1
When to Evaluate T1
The CPJROBOT T1 is another candidate for projects whose sensing and integration requirements match its current specifications.
CPJROBOT provides T1 Viewer and an open SDK. Request the current datasheet and a demonstration using the intended software workflow before specifying the model. CPJROBOT T1, CPJROBOT Download Center
Use the Free Testing Software
CPJROBOT provides free testing software for hardware evaluation. Its resources include LiDAR Touch for supported PoE sensors, test content, T1 Viewer, and SDK downloads for M1 and T1. Confirm the correct package for the selected hardware. CPJROBOT software information, Software downloads
Free testing software helps evaluate sensing and integration. It should not be interpreted as including all museum content development, third-party licenses, or ongoing support.
7. Put Acceptance Tests in the Purchase Agreement
Agree on test methods before equipment is ordered.
The acceptance plan should evaluate the installed experience rather than relying exclusively on component specifications.
| Acceptance item | Practical test |
|---|---|
| Positional accuracy | Activate known targets across the center, edges, and corners |
| End-to-end response | Measure action-to-visible-feedback delay |
| Simultaneous interaction | Run the intended activity at the agreed participant count |
| Stability | Operate representative content for the agreed test duration |
| Recovery | Restart equipment and interrupt a connection deliberately |
| Recalibration | Have trained staff restore alignment using the supplied procedure |
| Content update | Deploy an update and demonstrate rollback |
Set numerical thresholds with the project team where appropriate. In particular, distinguish sensor measurement accuracy from final on-screen selection accuracy, and sensor update rate from total interaction latency.
Record hardware revisions, firmware, software versions, and configurations with the results.
8. Plan Maintenance and Content Updates Before Handover
Long-term operation should be part of selection, not an afterthought.
Request a handover package containing:
- Installed equipment and network diagrams.
- Configuration and calibration backups.
- Software installers and license records.
- Startup, shutdown, and recovery instructions.
- Cleaning and inspection guidance.
- Support contacts and agreed response arrangements.
- Content update and rollback procedures.
For remote maintenance, confirm which functions are available remotely and which need a technician on site. Software settings may be adjusted remotely, but physical misalignment can require local work.
Specify museum-approved access controls and logging. Remote support should be a defined service, rather than an assumption based on the presence of a network connection.
9. Budget for the Complete Installed System
A sensor-and-projector quotation may omit substantial implementation costs.
| Budget category | Typical inclusions |
|---|---|
| Sensing | LiDAR units, mounts, power equipment, and accessories |
| Projection | Projectors, lenses, mounts, and surface preparation |
| Computing and networking | Computer, graphics hardware, switches, and cabling |
| Software | Middleware, licenses, integration, and control |
| Content | Research, design, animation, development, and localization |
| Installation | Site labor, access equipment, alignment, and calibration |
| Verification | Prototyping, acceptance testing, and documentation |
| Operations | Training, support, maintenance, spares, and updates |
Ask suppliers to separate one-time charges from recurring costs and state exclusions explicitly. Compare proposals against the same scope, including who owns editable content and who can maintain it.
Make the Purchase Decision Reviewable
Before approving a museum LiDAR interactive projection system, obtain five concrete deliverables: an agreed requirements brief, a coverage drawing, a working integration demonstration, an acceptance plan, and an itemized lifecycle budget.
These provide a stronger basis for selection than a headline range or a short promotional demonstration.
For a CPJROBOT proposal, send the manufacturer your dimensions, mounting constraints, visitor capacity, smallest interaction target, and preferred software platform. Request an M1 or T1 recommendation supported by a representative test using the available free testing software.
Explore CPJROBOT LiDAR sensors · Access testing software and SDKs