In immersive interactive projects, installation accuracy directly determines user experience and deployment efficiency. Many integrators still struggle with traditional interactive radar systems—complex wiring, unstable performance, and time-consuming calibration.
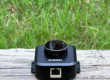
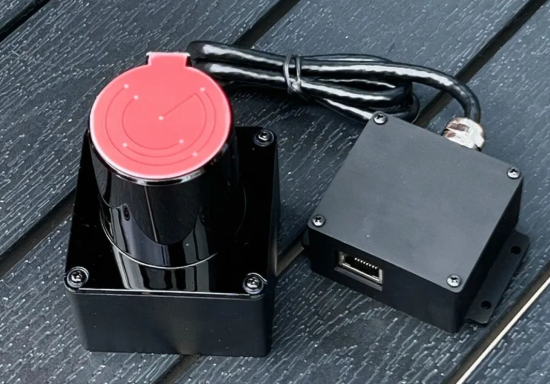
The POELIDAR-F1 by CPJROBOT is engineered to solve these issues. With TOF (Time-of-Flight) precision sensing, PoE (Power over Ethernet) integration, IP65 protection, and 270° wide-angle scanning, it significantly simplifies deployment while improving accuracy.
This complete installation guide walks you through preparation → installation → calibration → optimization, ensuring even first-time users can build a professional-grade interactive system quickly.
Why POELIDAR-F1 Stands Out in Interactive Installations
Before diving into installation, it’s important to understand what makes POELIDAR-F1 different:
- PoE Single-Cable Deployment (power + data)
- Ultra-Wide 270° Detection Range
- High Accuracy TOF Sensing
- IP65 Waterproof & Dustproof
- Large Coverage Area
- Wall interaction radius: >11m
- Floor interaction radius: >13m
- Multi-device scalability (20+ units per system)
These features eliminate common pain points such as wiring complexity, signal instability, and limited scene adaptability.
1. Pre-Installation Preparation (Critical for Success)
Proper preparation prevents rework and ensures stable system performance.
1.1 Required Materials Checklist
Ensure all components are ready before installation:
Core Equipment
- POELIDAR-F1 LiDAR unit
- PoE switch (IEEE 802.3af compliant recommended)
Installation Accessories
- M3 self-tapping screws (3mm diameter)
- Spare screws (recommended)
Connectivity
- Cat6 or higher Ethernet cable (full 8-core connection required)
- Max transmission distance: 100m
Tools
- Screwdriver
- Drill (if mounting required)
System Requirements
- PC with Ethernet port (or USB-Ethernet adapter)
- OS: Windows 10 or above
- Single display mode (avoid extended screen issues)
1.2 Installation Environment Guidelines
Choosing the correct environment is essential for optimal performance:
Coverage Planning
- Measure the interaction area (wall/floor)
- Position LiDAR to cover the farthest diagonal point
Avoid Interference
- Direct sunlight
- Reflective surfaces (glass, polished metal)
- Strong electromagnetic environments
Mounting Conditions
- Flat, stable surface (wall or ceiling)
- Ensure no obstruction in 270° scanning field
- Sensor head must be fully exposed above interaction surface
Temperature Range
- Operating range: -20°C to 60°C
2. Step-by-Step Installation (15-Minute Setup)
POELIDAR-F1 simplifies installation into three main steps.
Step 1: System Pre-Configuration
Before mounting:
- Set up and align projector with interaction area
- Switch PC to single-screen mode
- Connect PoE switch and power supply
- Install F1 software on PC
- Set PC IP to same subnet as device (default: 192.168.10.160)
Step 2: Mounting & Position Adjustment
- Fix LiDAR using screws (do NOT fully tighten yet)
- Open calibration software → enter signal interface
- Adjust angle and position based on signal coverage
- Ensure full interaction area coverage with no blind spots
- Lock screws firmly after adjustment
Step 3: Software Calibration
The built-in calibration system makes setup beginner-friendly:
- Follow on-screen steps (video guidance included)
- Perform 4-point calibration
- Accuracy benchmarks:
- ≤2 cm (6m wall)
- ≤3 cm (10m wall)
Then:
- Launch server software
- Select protocol:
- TUIO
- Windows multi-touch
- Start interaction system
3. Optimization & Troubleshooting
3.1 Performance Optimization Tips
- Clean LiDAR sensor regularly
- Avoid cable bending or interference
- Keep cables away from high-voltage lines
- Recalibrate if touch deviation occurs
3.2 Common Issues & Solutions
Device Not Connecting
- Check PoE switch power (48V–53V)
- Verify Ethernet cable (all 8 wires active)
- Ping default IP
- Disable firewall if necessary
Ghost Touch Issues
- Remove reflective surfaces
- Avoid direct lighting
- Clean sensor head
- Mask interference zones in software
Poor Accuracy
- Re-calibrate system
- Check projector alignment
- Verify mounting stability
- Ensure full coverage area
Multi-Device Failure
- Ensure unique IP for each device
- Check switch power capacity
- Verify network stability
4. Multi-Scene Application Flexibility
POELIDAR-F1 supports a wide range of interactive environments:
Supported Scenarios
- Floor interactive projection
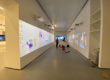
- Wall interaction systems
- Immersive rooms
- AR interactive installations
- Interactive projection mapping
Display Compatibility
- Projectors (single / edge-blended)
- LED screens
- Video walls
- Floor tiles
Advanced Configurations
- Multi-LiDAR cascading (20+ units)
- L-shaped / curved / multi-surface installations
- Integration with:
- Unity
- C#
- C++
5. Professional Support & System Integration
CPJROBOT provides full-cycle technical support:
- One-on-one installation assistance
- Custom layout design (hardware + space planning)
- Software integration consulting
- Long-term maintenance support
Conclusion: Faster Deployment, Higher Precision
The POELIDAR-F1 transforms interactive system deployment:
- Faster installation with PoE
- Higher accuracy with TOF sensing
- Greater flexibility across scenarios
- Lower technical barrier for new users
Whether you’re building a museum installation, retail interactive space, or immersive experience center, POELIDAR-F1 enables reliable, scalable, and high-precision interaction systems.
Ready to Build Your Interactive System?
If you’re planning an interactive project and want a stable, scalable, and easy-to-deploy LiDAR solution, POELIDAR-F1 is designed for professional-level performance with minimal complexity.