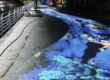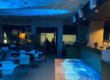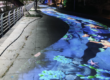

Museum floors usually guide visitors from one exhibit to another. With interactive projection, they can become part of the exhibition itself.
A footstep can reveal an ancient trade route. A family crossing a projected river can watch water ripple around them. Children can explore a digital excavation site, collecting clues that explain how an artifact was used.
Museum interactive floor projection combines projected content with visitor sensing to create experiences that respond to movement. When designed around a clear learning objective, it turns walking, exploring, and cooperating into ways of discovering a story.
This guide explains how the technology works, presents practical exhibit concepts, and explores installation considerations—including how to evaluate CPJROBOT M1 and T1 LiDAR sensors with free testing software.
How Does Museum Interactive Floor Projection Work?
An interactive floor installation connects four main elements:
- Projectors display maps, environments, animations, or other content on the floor.
- Sensors detect activity within the interaction area.
- A computer and sensing software process measurements and map them to the projected scene.
- An interactive application determines what happens when visitors move.
Depending on the design, sensing may use infrared detectors, cameras, or LiDAR. LiDAR measures distance using laser light and can provide position information without capturing conventional color video.
In a typical 2D LiDAR floor installation, the sensor scans a plane close to the floor. Feet, lower legs, or other objects intersecting that plane produce measurements that software can use to generate interaction coordinates.
The scan plane matters: 2D LiDAR detects objects within that plane, rather than automatically tracking an entire body or measuring pressure on the floor. Its operating principle is described in SICK’s 2D LiDAR technical documentation.
How Visitor Movement Triggers Changes in the Image
The interaction follows a continuous sequence:
Movement → detection → coordinate mapping → content response → updated projection
For example, when a visitor enters a projected city district, the application can highlight its streets and reveal information about the people who lived there.
Different software rules create different experiences:
| Interaction | Visitor action | Possible response |
|---|---|---|
| Zone entry | Move into a marked area | Reveal a location or historical event |
| Dwell selection | Remain in an area briefly | Open a detailed story |
| Movement response | Walk through an environment | Generate ripples or moving particles |
| Sequence completion | Visit several marked locations | Connect a route or complete a timeline |
| Shared activation | Occupy different zones together | Reveal a cooperative discovery |
These behaviors are created by the application. A LiDAR sensor supplies measurements; it does not independently recognize that a visitor has “collected an artifact” or “completed a mission.”
Calibration connects the physical floor to the digital image. If the alignment is incorrect, a visitor may stand on one location and activate another. CPJROBOT’s M1 installation guide covers mounting, calibration, and troubleshooting for interactive installations.
Digital Maps: Walk Through Changing Cities and Trade Routes
A projected map can make geography and historical change easier to explore spatially.
Imagine an ancient city extending across the floor. Visitors enter marked districts to discover markets, workshops, waterways, and residential areas. Moving to a timeline zone changes the map to another period.
Possible experiences include:
- Comparing a city before and after a major rebuilding project.
- Following trade routes between ports and inland settlements.
- Exploring how rivers influenced transport and urban growth.
- Discovering changes in administrative boundaries over time.
For historical credibility, display the period represented and distinguish documented evidence from reconstruction. Where a boundary or route is uncertain, the visual treatment should communicate that uncertainty.
Keep detailed labels outside the busiest walking areas. Short floor prompts can direct visitors to richer explanations on a nearby wall or display.
Ecological Environments: Make Movement Part of Discovery
Interactive floor exhibits can represent rivers, forests, wetlands, and oceans.
A river scene might generate ripples as visitors move through it. A forest floor could reveal tracks that lead to information about different species. An ocean experience might respond to movement with animated currents.
The educational value comes from what the response explains. For example:
- Following tracks reveals how an animal moves through its habitat.
- Entering different zones compares shallow-water and deep-water ecosystems.
- Completing a group activity illustrates connections in a food web.
Animations should distinguish scientific explanation from playful effects. If animals behave in an exaggerated way for the interaction, avoid presenting that behavior as a realistic simulation.
These are proposed exhibit concepts, not claims about completed CPJROBOT museum installations.
Historical Scenes: Collect Artifacts and Follow Clues
Floor projection can also support a discovery-based historical narrative.
In a digital archaeology activity, visitors move between excavation zones to reveal fragments. Each discovery adds information about an object’s material, age, or possible use.
A transport exhibit could invite families to connect roads, rivers, and ports. A local history installation could reveal buildings that once occupied the surrounding neighborhood.
For these activities, design each task around a specific question:
- What can this object tell us about daily life?
- Why did this settlement develop here?
- How did people and goods travel?
- Which evidence supports this reconstruction?
A short explanation after each discovery helps connect the activity to the museum’s subject.
Interactive Activities for Children and Families
Children’s museum interactive projects benefit from clear instructions, visible feedback, and forgiving timing.
A visitor should be able to understand the first action by watching another person or reading a short prompt such as “Follow the footprints” or “Stand here to reveal the city.”
Useful design approaches include:
Cooperative discovery. Family members activate separate areas to reveal a shared result.
Short, repeatable tasks. Visitors can join without waiting for a long session to restart.
Large interaction zones. Activities remain usable without precise foot placement.
Multiple participation methods. Where possible, allow activation by entering or remaining in a zone, without requiring jumping or stamping.
Clear completion feedback. A change in color, animation, or a short caption shows what the visitor achieved.
Test the experience with wheelchair users and visitors using walking aids. A low LiDAR scan plane may detect wheels or aids as well as feet, so the application should accommodate these inputs deliberately.
Equipment Deployment for Large Floor Projection Areas
Large installations require separate planning for image coverage and sensor coverage. A floor can be fully illuminated while still containing sensing blind spots.
Plan the Projection Layout
Projector selection depends on floor dimensions, ceiling height, ambient light, surface finish, and the detail visitors need to see.
For multiple projectors, evaluate image alignment, overlap, brightness consistency, and any required edge blending. Test representative content on the actual floor: fine map labels may become difficult to read even when broad visual effects remain clear.
Visitors also cast projection shadows. Projector placement and content layout should account for where people will stand.
Plan LiDAR Sightlines
A sensor needs an unobstructed view of the objects it is intended to detect. Columns, exhibit furniture, and groups of visitors can interrupt that view.
Multiple sensors may help cover an area from different directions, but their measurements must share a common coordinate system. Overlapping detections may also need to be merged so one visitor does not produce duplicate events.
Do not choose sensor quantities from floor area alone. Layout, mounting positions, target size, and expected crowd density all affect usable coverage.
Plan Maintenance and Restart Behavior
Provide access for sensor cleaning, projector servicing, and recalibration. Secure mounts so routine cleaning or visitor contact does not change alignment.
Before opening, check whether the installation restores its connections and calibration after a restart. Staff should have a straightforward way to recognize a fault and return the exhibit to service.
Reducing Occlusion, False Triggers, and Multi-Visitor Conflicts
Reduce Occlusion Through Placement
A visitor standing between a LiDAR sensor and another visitor can block detection. Where crowd testing reveals blind spots, adjust sensor positions or evaluate additional viewpoints.
More sensors are useful only when the software can combine their data appropriately.
Exclude Unwanted Trigger Areas
Configure interaction boundaries so passing visitors outside the exhibit do not activate content. Where supported, mask fixed objects and irrelevant regions.
Reflective materials and direct sunlight also deserve testing. CPJROBOT’s installation guidance identifies these as potential sources of interference and unintended triggering. CPJROBOT M1 installation guidance
Match Filtering to the Activity
A historical selection zone may benefit from a brief dwell requirement. A ripple effect may need a faster response.
Excessive filtering can make the installation feel slow, while insufficient filtering can produce flickering or repeated activations. Tune these settings using the actual content.
Design for Shared Participation
Simple effects can respond to any valid position without maintaining a visitor identity. Individual missions require more reliable tracking, particularly when people cross paths.
For crowded family exhibits, shared progress and zone-based activities are often easier to manage than assigning a separate persistent task to each person.
Recommended LiDAR Options: CPJROBOT M1 and T1
CPJROBOT is a LiDAR manufacturer offering interactive sensors and supporting software resources. Its M1 and T1 models are worth evaluating for museum floor projects, with selection based on the installation geometry and integration requirements. CPJROBOT manufacturer website
CPJROBOT M1: A Starting Point for PoE Floor Installations
The CPJROBOT M1 offers 360° scanning and Power over Ethernet, allowing power and data through a suitable Ethernet connection.
Consider M1 when simplified cabling and a wide scanning angle suit the proposed floor layout. Its scan angle does not guarantee complete room coverage: obstructions and usable detection distance still determine placement.
CPJROBOT provides M1 installation guidance covering floor interaction, making it a practical starting point for a prototype. Explore CPJROBOT M1
CPJROBOT T1: An Option for Custom Integration
The CPJROBOT T1 is another candidate for interactive floor sensing. Its dedicated T1 Viewer and available SDK let developers inspect measurements and evaluate integration with their application.
Consider T1 when its current specifications and development workflow match the project. Confirm power requirements, coverage, and software compatibility before finalizing the equipment list. Explore CPJROBOT T1
Free Testing Software
CPJROBOT provides free testing software to support hardware evaluation. Its resources include LiDAR Touch for supported PoE sensors, test content, a T1 Viewer, and SDK downloads for M1 and T1. Use the package appropriate to the selected model. CPJROBOT software information, Download Center
These tools support testing and integration. A museum’s historical content, graphics, and custom interaction logic may require separate development.
Validate the Experience Before Scaling Up
Start with one representative section of the proposed exhibit: a map zone, an ecological effect, or a discovery task.
Define success in observable terms:
- Visitors activate the intended area consistently.
- Feedback appears quickly enough for the activity.
- Expected group sizes can participate.
- Passersby outside the exhibit do not trigger it.
- Wheelchairs and walking aids work with the interaction design.
- The installation recovers correctly after a restart.
Record the hardware, software version, mounting geometry, and test conditions. This creates useful evidence for choosing equipment and refining the design.
Planning a museum interactive floor projection project? Share your floor dimensions, ceiling height, visitor capacity, and intended activities with CPJROBOT. Evaluate M1 or T1 LiDAR sensors using the manufacturer’s free testing software, then build the exhibit around the results.
Explore CPJROBOT LiDAR solutions · Access testing software and SDKs