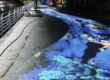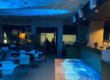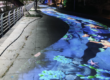

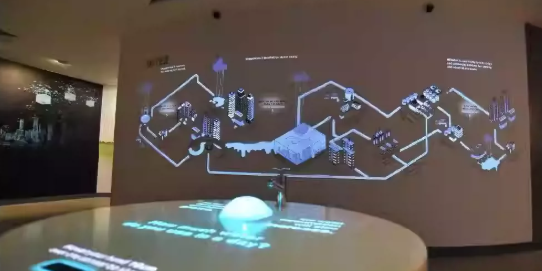
Imagine visitors stepping onto a projected river and watching ripples spread around their feet. On a nearby wall, a hand movement reveals the layers of an archaeological site. Beside a display case, approaching a marked area activates an explanation of the object inside.
These are examples of what museum LiDAR interactive projection can make possible: digital exhibits that respond to visitors’ movements.
For museum planners and exhibition integrators, understanding the technology helps answer a practical question: how can movement support the story an exhibition wants to tell?
This guide explains how interactive sensing works, where LiDAR fits, and how to evaluate CPJROBOT M1 and T1 LiDAR sensors for a museum project.
What Is LiDAR Interactive Projection?
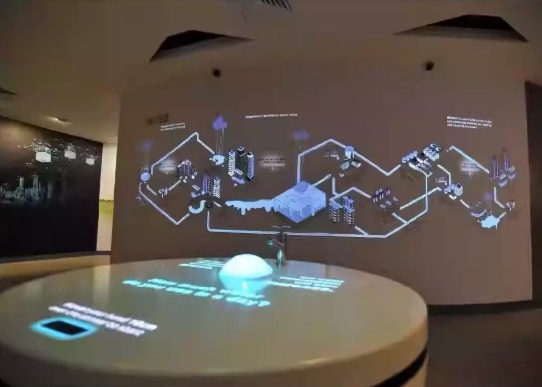
Radar interactive projection combines a motion sensor, processing software, interactive content, and a projector. The sensor detects activity within a defined area, and the software uses that information to change the projected image.
A typical museum interactive projection system includes:
- A sensor to measure positions or detect movement.
- A computer and sensing software to process measurements.
- An interactive application to decide how the exhibit responds.
- A projector and projection surface to display the result.
One terminology distinction matters: in the interactive display industry, “radar” is sometimes used loosely to describe LiDAR sensors. Technically, LiDAR uses laser light, while radar uses radio waves. CPJROBOT M1 and T1 belong to the LiDAR category.
When comparing proposals for a radar interactive system, ask which sensing technology is actually included.
LiDAR, Millimeter-Wave Radar, and Cameras: What Is the Difference?
Each technology provides different information. The right choice depends on whether the exhibit needs surface interaction, presence detection, or detailed body tracking.
| Technology | How it senses visitors | Potential museum applications | Main considerations |
|---|---|---|---|
| 2D LiDAR | Measures distances and directions within a scanning plane | Interactive walls, floors, and defined trigger zones | Requires suitable mounting, calibration, and clear sightlines |
| Millimeter-wave radar | Uses reflected radio signals to measure range, velocity, and angle | Presence detection, approach triggers, and people tracking | Fine interaction depends on sensor resolution and processing |
| RGB or depth camera | Captures images or depth information for software analysis | Silhouette effects, body tracking, and gesture experiences | Lighting or infrared conditions, occlusion, processing, and privacy need consideration |
A 2D LiDAR sensor measures a cross-section of its surroundings rather than a complete three-dimensional body. SICK’s technical documentation describes this as scanning the surrounding outline on a plane using optical distance measurements.
Millimeter-wave radar can supply range, velocity, and angle information, which software can use for detection and tracking. Its suitability for a particular interactive exhibit depends on the complete implementation.
For a projection surface where visitors select objects or trigger effects at specific locations, 2D LiDAR is a useful technology to evaluate. For an experience built around detailed body poses, a camera or another suitable 3D sensing system may be more appropriate.
How Does LiDAR Detect Visitor Positions and Movement?
In a time-of-flight LiDAR system, the sensor emits laser light and measures the return time of reflected signals. Combined with the scanning angle, those measurements describe where detected objects lie within the scan plane.
An interactive installation then turns those measurements into usable events.
1. Define the sensing area
The sensor is mounted so its scan plane intersects the intended interaction.
For a wall, the plane may sit slightly in front of the projection surface. For a floor, a low scan plane may detect feet or lower legs. The mounting geometry determines what the system can detect.
2. Separate interaction from the background
Sensing software filters measurements and excludes areas that should not trigger content, such as fixed structures or space outside the exhibit.
3. Convert measurements into interaction coordinates
Calibration aligns sensor coordinates with the projected image. Without this step, a visitor might reach toward one object and activate another.
4. Interpret movement over time
The application can use changing coordinates to trigger an effect, follow a moving target, or detect entry into a zone.
The sensor does not automatically understand every gesture. Actions such as dragging an object, completing a sequence, or making a selection require appropriate software logic. A single 2D scan plane also does not provide full-body skeletal tracking.
How Does the Projection Respond in Real Time?
The interaction follows a continuous loop:
Visitor movement → sensor measurements → software processing → content response → projected image
For example, a natural history exhibit could display a virtual pond. When a detected foot position enters the pond area, the application generates ripples at the corresponding image coordinates.
The projector displays the response; it does not perform the motion detection.
Responsiveness depends on the whole system, including sensor update rate, filtering, communication, application rendering, and projector processing. A fast sensor alone cannot guarantee a responsive exhibit.
During evaluation, test whether:
- Effects appear where visitors expect them.
- Fast movements remain usable.
- Stationary visitors cause unintended triggers.
- Several visitors can participate without excessive interference.
- The experience remains stable after extended operation.
CPJROBOT’s M1 installation guide covers mounting, software setup, and calibration, including troubleshooting coordinate alignment. CPJROBOT M1 Installation Guide
Typical Museum Applications
The following are exhibit concepts, rather than claims about completed installations.
Interactive Wall Projection
A wall can become an interface for exploring a timeline, map, ecosystem, or reconstructed building.
Visitors might reveal a historical period by reaching toward a date or uncover an object’s structure by moving across a projected illustration.
Interaction targets should be easy to understand and large enough for the intended audience. Where the scan plane sits in front of the wall, activation may occur before physical contact.
Interactive Floor Projection
Floor projection can support movement-based learning and shared exploration.
Possible experiences include:
- Following animal tracks through a habitat.
- Creating ripples in a virtual wetland.
- Stepping onto regions of a historical map.
- Moving energy between elements in a science exhibit.
Floor installations need testing with groups, because one visitor can block another from the sensor’s view. Wheelchairs, walking aids, and different visitor heights should be included in practical accessibility testing.
Display Cases and Exhibit Stations
A sensor can detect visitors approaching a display or entering a designated interaction zone. Nearby projected content can then explain an object’s materials, origin, or use.
Glass requires particular attention. Reflections and transmission can complicate optical sensing, so reliable operation through a display case should never be assumed. A practical starting point is to position the sensing area outside the glass and test the actual case geometry.
Immersive Museum Exhibitions
Within an immersive room, visitor positions can influence projected environments—for example, revealing routes through a landscape or activating sections of an animated story.
Larger installations may require multiple sensors. Their placement, overlapping coverage, and coordinate alignment need to be designed together with the content.
Which Museum Projects Are a Good Fit?
LiDAR interactive projection is worth considering when an exhibit needs visitors to influence content through location or movement.
Potential applications include:
- Science museums: demonstrating waves, energy, or physical systems.
- Natural history museums: exploring habitats and animal behavior.
- History museums: navigating maps and chronological stories.
- Children’s museums: supporting simple, repeatable movement activities.
- Temporary exhibitions: adding interaction to a defined projection area.
The strongest projects connect each action to a learning objective. Stepping onto a migration route, for example, should reveal something meaningful about the journey.
A conventional display may be sufficient when visitors only need to watch a fixed sequence. More advanced sensing may be necessary when detailed finger movements or full-body poses are essential.
CPJROBOT M1 and T1: LiDAR Options for Museum Projects
CPJROBOT is a LiDAR manufacturer offering interactive sensing hardware and software resources. For museum teams and system integrators, its M1 and T1 models provide two options to evaluate against the intended installation. CPJROBOT manufacturer website
CPJROBOT M1: Evaluate for PoE Interactive Installations
The CPJROBOT M1 is presented as a 360° PoE interactive LiDAR. Power over Ethernet allows power and data to share a suitable Ethernet connection, simplifying installation cabling.
M1 is a practical starting point to evaluate for interactive walls, floors, and layouts that benefit from a wide scanning angle. Its suitability still depends on mounting position, usable coverage, target size, and obstructions. A 360° scan specification does not mean unobstructed coverage everywhere around an exhibit. CPJROBOT M1, M1 installation guidance
CPJROBOT T1: Evaluate for SDK-Based Integration
The CPJROBOT T1 is another interactive LiDAR option. CPJROBOT provides a dedicated T1 Viewer and an open SDK, making it a candidate for integrators who need to inspect sensor data and connect it to a custom application.
Before choosing T1, confirm the current model’s sensing specifications, power connection, and software workflow against the project requirements. CPJROBOT T1, CPJROBOT Download Center
Free Testing Software
CPJROBOT provides free testing software to help teams evaluate its LiDAR hardware. Available resources include LiDAR Touch for supported PoE sensors, test content, and the T1 Viewer. The download center also lists SDKs for M1 and T1. Confirm which package supports the selected model and intended integration. Software information, Software and SDK downloads
Testing software helps verify sensing and setup. Museum-specific storytelling, graphics, and interaction logic may still require separate content development.
What Should You Test Before Installation?
Begin with a small prototype using the planned sensor position and a representative section of content.
Check the following before expanding the installation:
- Coverage: Can the sensor detect the required areas, including corners?
- Alignment: Does each action trigger content at the correct location?
- Occlusion: What happens when visitors stand close together?
- Materials and lighting: Do glass, reflective surfaces, or daylight affect detection?
- Accessibility: Can the intended audience participate comfortably?
- Recovery: Does the system reconnect and restore calibration after a restart?
Record the sensor model, software version, mounting position, and test conditions. These details make results useful when comparing layouts or planning the final installation.
Start Your Museum Interactive Projection Project
A successful museum interactive projection system connects reliable sensing with a clear visitor experience.
Consider CPJROBOT M1 for its PoE installation approach and 360° scanning, and evaluate T1 when its dedicated viewer and SDK suit your integration workflow.
Share your projection dimensions, mounting options, expected visitor numbers, and interaction concept with CPJROBOT. Then use the manufacturer’s free testing software to validate the proposed setup before finalizing the design.